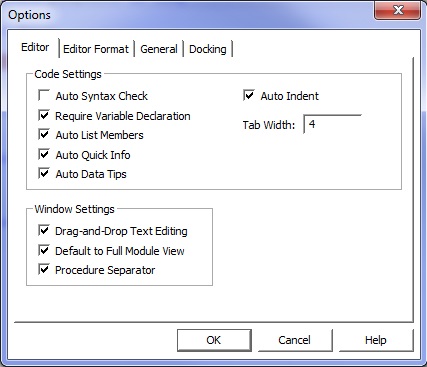
The VBA Integrated Development Environment provides a limited set of options under Tools > Options which will let you customise the environment for your own personal needs.
Microsoft hasn’t added anything new to this part of MS Office for many years so you’re not going to get the rich interactivity of an application such as Visual Studio 2012. Nevertheless, there are some important settings which need to be understood so here’s a quick overview of some key ones together with the settings I use.
Editor Tab
Editor – Auto Syntax Check
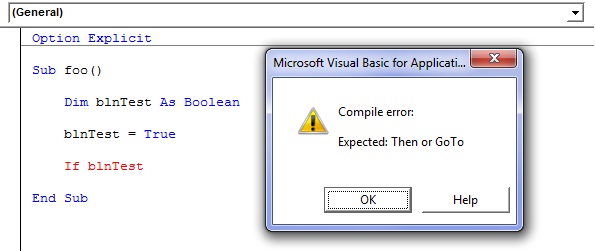
This setting defines whether or not you want to receive a message box when you write a line of VBA code which is syntactically invalid, like so:
Oops, I pressed Enter too early and the message box helpfully informed me that the line is missing a Then or Goto directive.
If you’re new to VBA then I recommend that you have this option ticked because the message box prompt will help you work out what’s wrong with your code. Personally, I find the message box intrusive and, since I’m familiar with the VBA syntax, I leave it unticked. The invalid line will still be highlighted in red for me, but I can carry on typing whatever piece of code was on my mind and go back and correct it later.
Editor – Require Variable Declaration
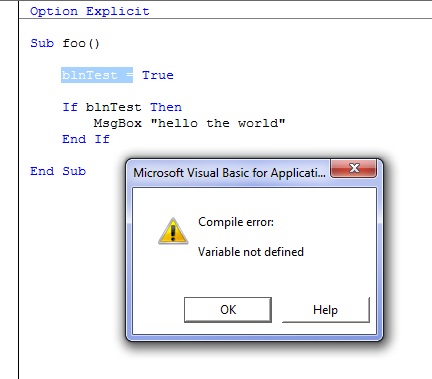
Having this option ticked means that an Option Explicit directive is automatically inserted into every new code module. Option Explicit statements force you to declare all of your constants and variables.
The fact is that, when you start learning VBA, having Option Explicit statements makes writing code harder. The compiler will complain that your variables aren’t declared and then, to make it happy, you have to go back and add in your variable declarations which is a real pain. To make things even worse, you’ll find that it’s best practice to give your variables an appropriate type when you declare them, so you have to learn about those too. Ugh.
Believe me when I say that the pain is worth it: having this check in place will save you countless hours of debugging because of silly typos in your code and, ultimately, it will give you a much better general understanding of VBA. Declaring your variables with appropriate types will mean that your code uses up less memory and runs faster and, when you’re using object variables (not Object), you’ll get the benefit of VBA IDE features such as intellisense when writing code. There are some syntactical nuances you need to be aware of when declaring variables and constants so have a read through these blog posts if you’re not already up to speed with them:
A Common Mistake When Declaring Variables In VBA
VBA: What Type Are Your Constants?
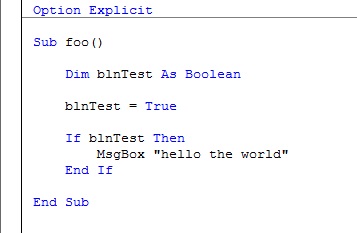
Let’s just scratch that itch and fix that compile error:
By default, the require variable declaration option comes unticked, which is a travesty. If you’re remotely serious about writing decent VBA code, turn it on and leave it on. Trust me.
Editor – Auto List Members
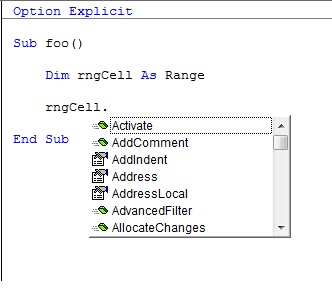
Have you noticed that, when you’re using a particular class in VBA, you can get a helpful Intellisense dropdown which lists the members you can use?
Provided your code doesn’t have any compile errors then that’s what the auto list members option gives you. At any point you can press TAB to auto-complete your construct using the selected member from the list. Handy.
There are very rare occasions when bugs in the VBA IDE mean that intellisense can give you a wrong suggestion. These really are extremely uncommon, so trust intellisense and let it help you write your code.
Editor – Auto Quick Info
Yet another setting which you should leave ticked. This one helps you when you’re typing code by giving you a pop-up box with the parameters you can use when you call a method or property, provided that it knows which class the method or property is a member of.
Editor – Auto Data Tips
This one gives you a useful pop-up box when you’re debugging code. I’ve talked about auto data tips on my blog before so, if you want to know more, have a look here.
Editor – Auto Indent
Auto Indent helps with the fluency of your code writing. Code indentation really warrants a blog post in itself but suffice to say that code is much easier to read if it is indented correctly. This setting means that when you press the Enter key, the next line will automatically have the same alignment as the previous one – which is what you’ll want most of the time.
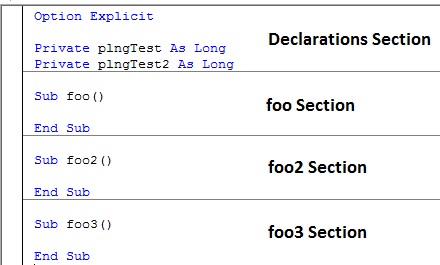
Editor – Default To Full Module View
If you have this setting ticked as I do then you can see all the code in a given code module at the same time. If it’s unticked then you can only see one section at a time but you can navigate through the sections by using the dropdown at the top right hand side of the code pane. Does anyone find it useful to have this unticked – I can’t think of a good reason to do so?
Editor – Procedure Separator
This one puts a horizontal line between different sections of your code module to help you distinguish between them when you’re in full module view . It’s totally up to you whether or not to use it, but I find it helpful.
Editor Format Tab
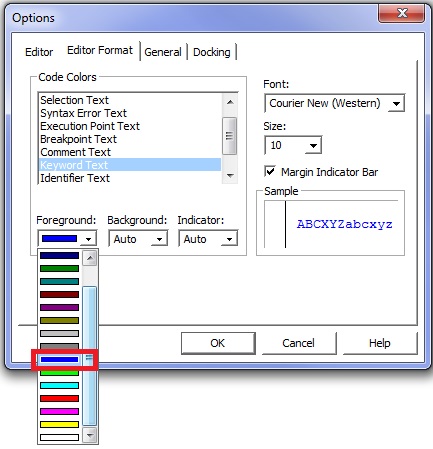
Other than the margin indicator bar (which speaks for itself and should be ticked so you can see icons such as breakpoints), all the settings on this tab define the text appearance of your code. Ultimately you’re entirely free to go to town with the text settings and I’ve seen all sorts of colours and fonts used by experienced VBA’ers. If I recall correctly, Roger Govier, a long time MS Excel MVP, uses an enlarged Comic Sans font, but perhaps that’s only for presentations? My own recommendation is that you should stick to a monospaced font such as the Courier New default and only change the text colours if you struggle to differentiate between the defaults.
For me, the keyword default blue is too dark and sometimes I have trouble distinguishing it from normal text. I have the foreground on this one set to a brighter, blue colour which matches the keyword text colour in Visual Studio.
But that’s the only customisation I have.
While I’m on the subject of keywords, have you noticed that the IDE sometimes highlights words which are not keywords in blue (or whatever keyword colour you have set)? Let me give you an example:
CStr() is not a keyword in VBA. It is a method from the VBA.Conversion class. I believe the erroneous VBA keyword highlighting is an offshoot from the Visual Studio 6 IDE.
General Tab
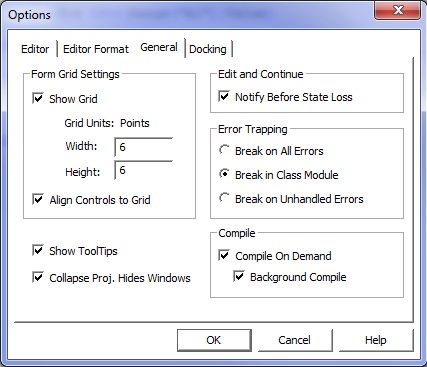
General – Show ToolTips
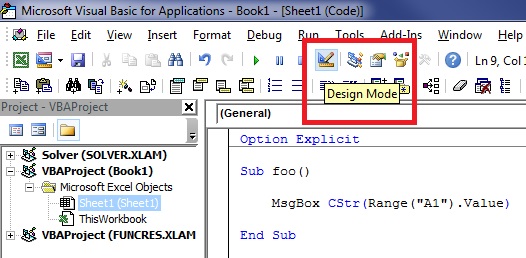
Show ToolTips is yet another setting which controls whether or not you get a little, yellow (okay, yours might not be yellow if you’ve changed it in your Windows settings) prompt box. This one is for toolbar controls in the VBA IDE itself:
General – Notify Before State Loss
State loss is another topic which I’ve written about on this blog before.
General – Error Trapping
Error trapping settings could call for an extensive discussion so all I will say here is that you probably want to have it on Break In Class Module. You probably do not want to have it on Break on All Errors unless you are doing some specific debugging.
General – Compile On Demand
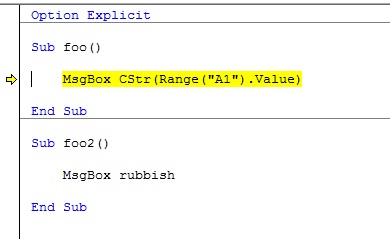
If compile on demand is unticked then all of your code is compiled before it is executed. If it is ticked then each bit of code is only compiled when it is needed.
With the setting ticked, I can quite happily step into and run the foo() method even thought foo2() is illegal and will not compile because rubbish has not been declared.
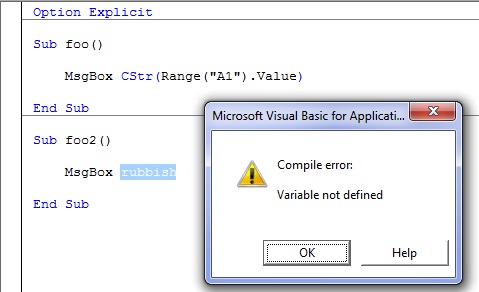
With the setting unticked I can’t do that and the compiler complains to me that I’ve got undisclosed rubbish in my code:
I generally have this option ticked.
Wrapping It Up
That covers most of the options. Do you have different settings to me and, if so, what advantages do you get from them?




Great article Colin! I’ve never really looked at these options and they are good to know.
I just wanted to mention that you can use the keyboard shortcut Ctrl+Space Bar to display the Intellisense menu. I don’t think it’s an option, but a great shortcut for your readers to know. It saves me a lot of time when coding. Especially when typing variable names. You can use the shortcut to auto-complete the variable name.
Thanks!
LikeLike
Thanks, Jon!
LikeLike
Reblogged this on Struggling To Excel and commented:
Understand the Visual Basic IDE better
LikeLike
Pingback: VBA: Move executing line anywhere | Microsoft Excel and Access Experts Blog
Pingback: Excel Roundup 20140224 | Contextures Blog
Hi Colin great post! I have just become aware of your blog, I am really enjoying it.
In the vein of this topic, perhaps one day you could do a post on using the Object browser in the VBE and how and when you use it. Do you use it day to day? I struggle with how to best use it or the process in using it and end up Googling instead. Which library to look is the first hurdle for instance ?
John
LikeLike
Hi John, thanks for your comment. I’ve added your suggestion to my topic to do list.
LikeLike
Pingback: #Excel Super Links #93 – shared by David Hager | Excel For You